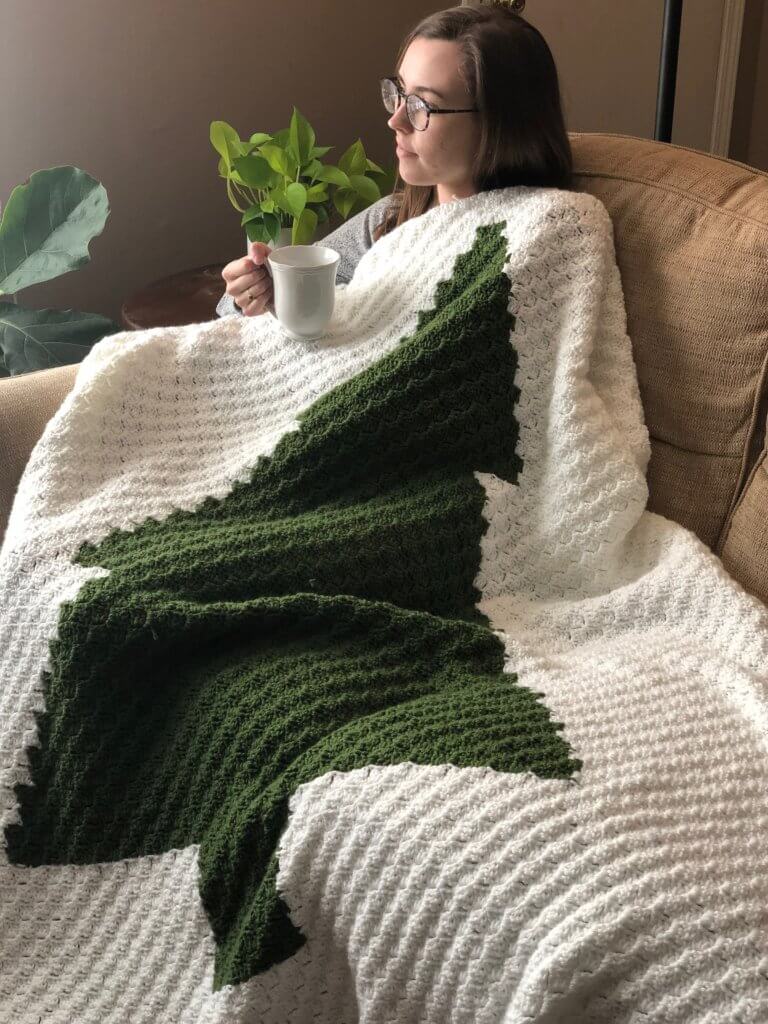
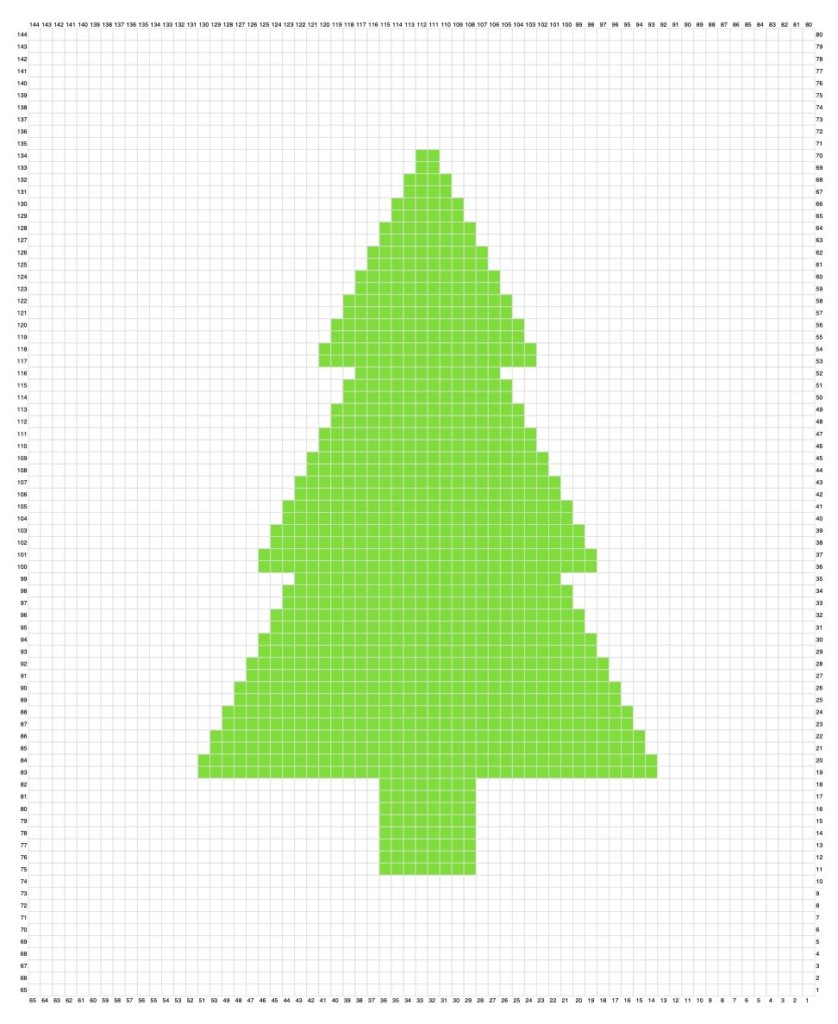
The easiest modern Christmas throw blanket using corner to corner crochet. Scroll down for the FREE pattern and chart!
 Inspiration:
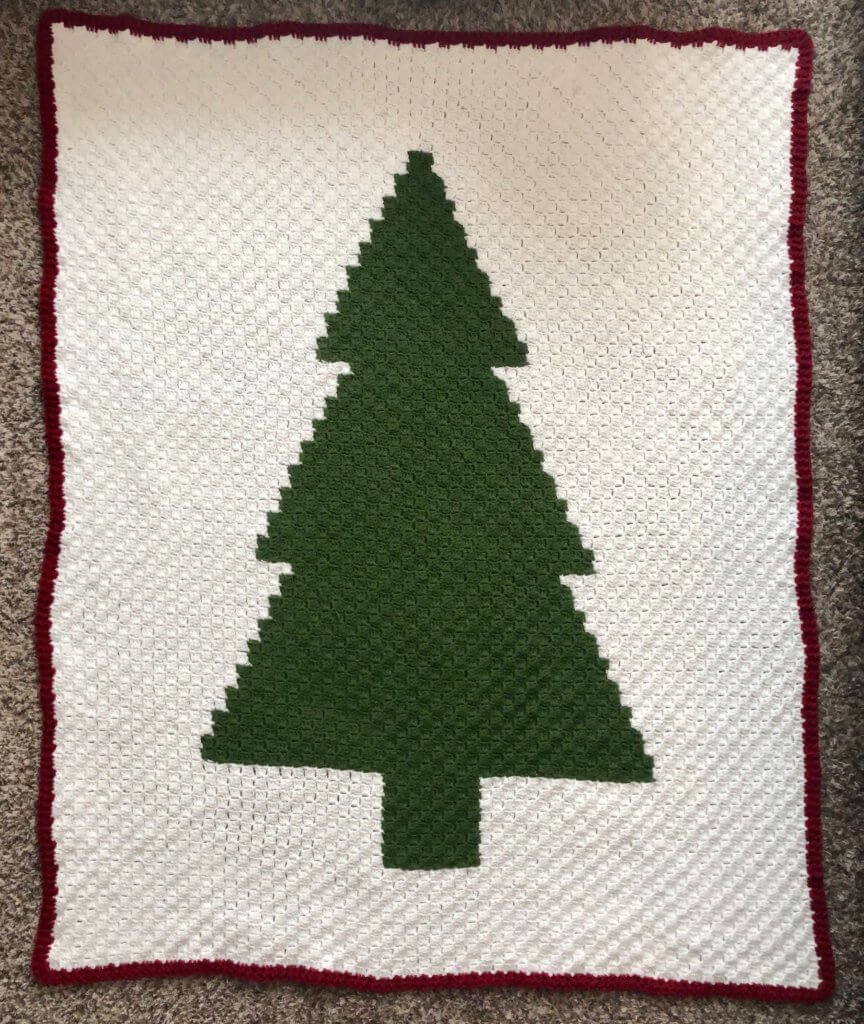
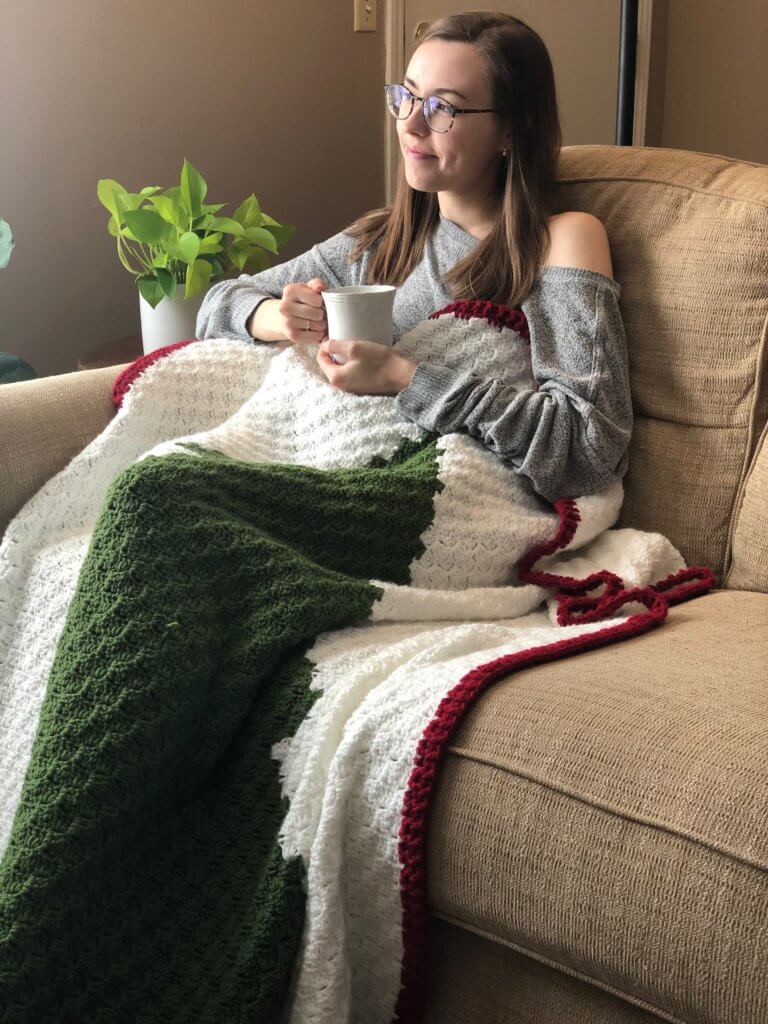
If you’ve been around the blog a bit, you’ve probably noticed that I tend to take on smaller projects. Beanies, cowls, headbands, that sort of thing. Well, I decided to take on something a bit larger this year. I fell in love with the idea of having a festive throw blanket on my couch for the holidays, but I wanted to make sure the design was still simple and modern. I pretty much immediately knew that I wanted to design a Christmas tree throw blanket using corner to corner crochet. If you’ve never heard of corner to corner (c2c) crochet, it is a technique that uses all double crochets to make little “tiles” that you slip stitch together as you go, working diagonally from one corner to the opposite corner. (See my beginner c2c tutorial here!) I chose c2c crochet because it makes color work very straightforward, and produces a really cool, modern, pixel-art-esque effect. If you’re like me and you usually avoid projects involving color changes, stay with me! See my post on how to change colors seamlessly in c2c crochet AND how to minimize ends to weave in!
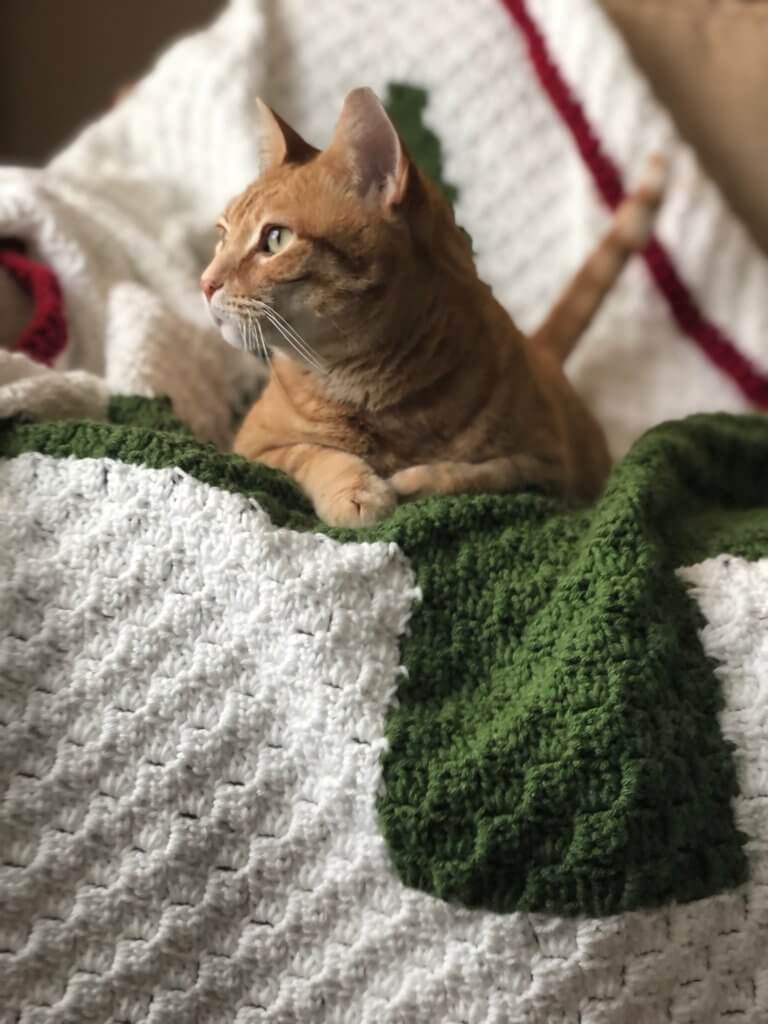
I was super happy with the result – and so was my cat, Oliver!
Yarn:
The yarn I chose for this project is Yarn Bee Soft & Sleek. This is a worsted weight yarn made of 100% low-pill acrylic. If you have any preconceived opinions on acrylic yarns, you can go ahead and throw those out the window. This yarn is SO soft, feels high-end, comes in a really great color selection, and it’s inexpensive – perfect for larger projects like this blanket! I had never used this yarn before, but it was a dream to work with. You can expect to see more projects using this yarn in the future!
Techniques:
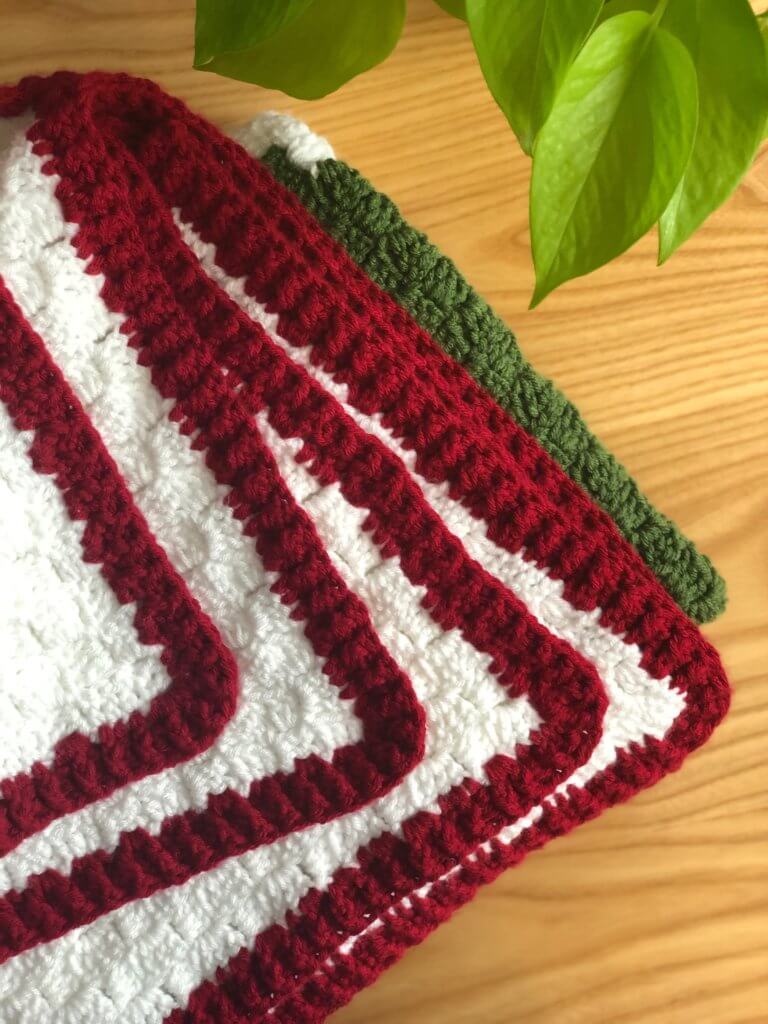
This Christmas throw blanket is made using corner to corner crochet. If you’ve never done c2c before, or if you need a refresher on the basics, see my ultimate beginner c2c tutorial and my post on how to change colors seamlessly! Once the main body of the blanket is finished, you will work the red border around the edges for that perfect finishing touch! I mean, look at that beautiful ribbed border! Working the border at the end also cuts down on color changes during the main section of the blanket.
Reading c2c patterns is a little different than reading other crochet patterns. Each row designates how many “tiles” of each color to make. So, instead of counting individual stitches, you will be counting tiles! Let’s get on to the pattern!
Pattern:
Get the ad-free, printable, PDF version of the pattern here.
I recommend purchasing the printable version so you can easily cross off rows as you complete them – this has prevented me from undoing hours of work because I made a counting error!
Supplies:
- 5.5mm (I) crochet hook (get my favorite hooks here)
- Yarn Bee Soft & Sleek yarn in the following quantities: 7 skeins in White (approximately 1624 yards), 3 skeins in Kale (approximately 696 yards), 1 skein in Chili Red (approximately 232 yards)
- Tapestry needle
Gauge:
- 5 tiles by 5 tiles in c2c = 4″ square
Dimensions:
Approximately 65″ x 48″, including border
Abbreviations:
- ch – chain
- dc – double crochet
- sl st – slip stitch
- fpdc – front post double crochet
- bpdc – back post double crochet
Notes:
- This pattern is written by number of “tiles” made in each color, so you will be counting by “tiles” instead of by stitches
- Each “tile” is made of ch 3 and 3 dc (for more details, see my c2c tutorial here)
- Each row is accompanied by an arrow. This is used to indicate which direction (clockwise or counter-clockwise) you should turn your work once you have multiple skeins of yarn attached, in order to keep your yarn from getting tangled! (For more tips on yarn management, see this tutorial!)
- The border is worked after the main body of the blanket by attaching yarn to the place you left off on the body, then crocheting around the perimeter of the blanket.
Pattern:
→ Row 1 [WS]: w
← Row 2 [RS]: w2
→ Row 3 [WS]: w3
← Row 4 [RS]: w4
→ Row 5 [WS]: w5
← Row 6 [RS]: w6
→ Row 7 [WS]: w7
← Row 8 [RS]: w8
→ Row 9 [WS]: w9
← Row 10 [RS]: w10
→ Row 11 [WS]: w11
← Row 12 [RS]: w12
→ Row 13 [WS]: w13
← Row 14 [RS]: w14
→ Row 15 [WS]: w15
← Row 16 [RS]: w16
→ Row 17 [WS]: w17
← Row 18 [RS]: w18
→ Row 19 [WS]: w19
← Row 20 [RS]: w20
→ Row 21 [WS]: w21
← Row 22 [RS]: w22
→ Row 23 [WS]: w23
← Row 24 [RS]: w24
→ Row 25 [WS]: w25
← Row 26 [RS]: w26
→ Row 27 [WS]: w27
← Row 28 [RS]: w28
→ Row 29 [WS]: w29
← Row 30 [RS]: w30
→ Row 31 [WS]: w31
← Row 32 [RS]: w13, g, w18
→ Row 33 [WS]: w18, g2, w13
← Row 34 [RS]: w14, g2, w18
→ Row 35 [WS]: w18, g3, w14
← Row 36 [RS]: w14, g4, w18
→ Row 37 [WS]: w18, g4, w15
← Row 38 [RS]: w15, g5, w18
→ Row 39 [WS]: w10, g, w7, g6, w15
← Row 40 [RS]: w16, g6, w6, g2, w10
→ Row 41 [WS]: w10, g3, w5, g7, w16
← Row 42 [RS]: w16, g8, w4, g4, w10
→ Row 43 [WS]: w10, g5, w3, g8, w17
← Row 44 [RS]: w17, g9, w2, g6, w10
→ Row 45 [WS]: w10, g7, w, g10, w17
← Row 46 [RS]: w18, g18, w10
→ Row 47 [WS]: w11, g18, w18
← Row 48 [RS]: w18, g18, w12
→ Row 49 [WS]: w13, g17, w19
← Row 50 [RS]: w19, g17, w14
→ Row 51 [WS]: w15, g17, w19
← Row 52 [RS]: w20, g16, w16
→ Row 53 [WS]: w17, g16, w20
← Row 54 [RS]: w18, g, w, g16, w18
→ Row 55 [WS]: w18, g16, w, g2, w18
← Row 56 [RS]: w19, g19, w18
→ Row 57 [WS]: w18, g20, w19
← Row 58 [RS]: w19, g21, w18
→ Row 59 [WS]: w18, g21, w20
← Row 60 [RS]: w20, g22, w18
→ Row 61 [WS]: w18, g23, w20
← Row 62 [RS]: w21, g23, w18
→ Row 63 [WS]: w18, g24, w21
← Row 64 [RS]: w21, g25, w18
→ Row 65 [WS]: w18, g25, w22
Corner Row:
← Row 66 [RS]: w22, g26, w17
→ Row 67 [WS]: w16, g27, w22
← Row 68 [RS]: w23, g27, w15
→ Row 69 [WS]: w14, g28, w23
← Row 70 [RS]: w23, g28, w14
→ Row 71 [WS]: w15, g26, w24
← Row 72 [RS]: w24, g25, w16
→ Row 73 [WS]: w17, g24, w24
← Row 74 [RS]: w25, g22, w18
→ Row 75 [WS]: w19, g21, w25
← Row 76 [RS]: w23, g, w, g20, w20
→ Row 77 [WS]: w21, g18, w, g2, w23
← Row 78 [RS]: w24, g19, w22
→ Row 79 [WS]: w21, g20, w24
← Row 80 [RS]: w24, g21, w20
Corner Row:
→ Row 81 [WS]: w19, g21, w24
← Row 82 [RS]: w23, g21, w19
→ Row 83 [WS]: w20, g20, w22
← Row 84 [RS]: w22, g18, w21
→ Row 85 [WS]: w22, g17, w21
← Row 86 [RS]: w20, g16, w23
→ Row 87 [WS]: w24, g14, w20
← Row 88 [RS]: w19, g13, w25
→ Row 89 [WS]: w26, g12, w18
← Row 90 [RS]: w18, g10, w27
→ Row 91 [WS]: w26, g11, w17
← Row 92 [RS]: w16, g12, w25
→ Row 93 [WS]: w24, g12, w16
← Row 94 [RS]: w15, g12, w24
→ Row 95 [WS]: w25, g11, w14
← Row 96 [RS]: w14, g9, w26
→ Row 97 [WS]: w27, g8, w13
← Row 98 [RS]: w12, g7, w28
→ Row 99 [WS]: w29, g5, w12
← Row 100 [RS]: w11, g4, w30
→ Row 101 [WS]: w31, g3, w10
← Row 102 [RS]: w10, g, w32
→ Row 103 [WS]: w42
← Row 104 [RS]: w41
→ Row 105 [WS]: w40
← Row 106 [RS]: w39
→ Row 107 [WS]: w38
← Row 108 [RS]: w37
→ Row 109 [WS]: w36
← Row 110 [RS]: w35
→ Row 111 [WS]: w34
← Row 112 [RS]: w33
→ Row 113 [WS]: w32
← Row 114 [RS]: w31
→ Row 115 [WS]: w30
← Row 116 [RS]: w29
→ Row 117 [WS]: w28
← Row 118 [RS]: w27
→ Row 119 [WS]: w26
← Row 120 [RS]: w25
→ Row 121 [WS]: w24
← Row 122 [RS]: w23
→ Row 123 [WS]: w22
← Row 124 [RS]: w21
→ Row 125 [WS]: w20
← Row 126 [RS]: w19
→ Row 127 [WS]: w18
← Row 128 [RS]: w17
→ Row 129 [WS]: w16
← Row 130 [RS]: w15
→ Row 131 [WS]: w14
← Row 132 [RS]: w13
→ Row 133 [WS]: w12
← Row 134 [RS]: w11
→ Row 135 [WS]: w10
← Row 136 [RS]: w9
→ Row 137 [WS]: w8
← Row 138 [RS]: w7
→ Row 139 [WS]: w6
← Row 140 [RS]: w5
→ Row 141 [WS]: w4
← Row 142 [RS]: w3
→ Row 143 [WS]: w2
← Row 144 [RS]: w
Fasten off, move on to border.
Border:
Attach red yarn to the place you just ended Row 144.
Round 1: dc evenly around around perimeter, working 3 dc in ea ch 3 sp, and 3 dc in ea corner. sl st to join.
Round 2: ch 3, * 1 fpdc, 1 bpdc, repeat from * around, alternating front- and back-post dc. sl st to join.
Fasten off, weave in ends, and enjoy your cozy new Christmas blanket!