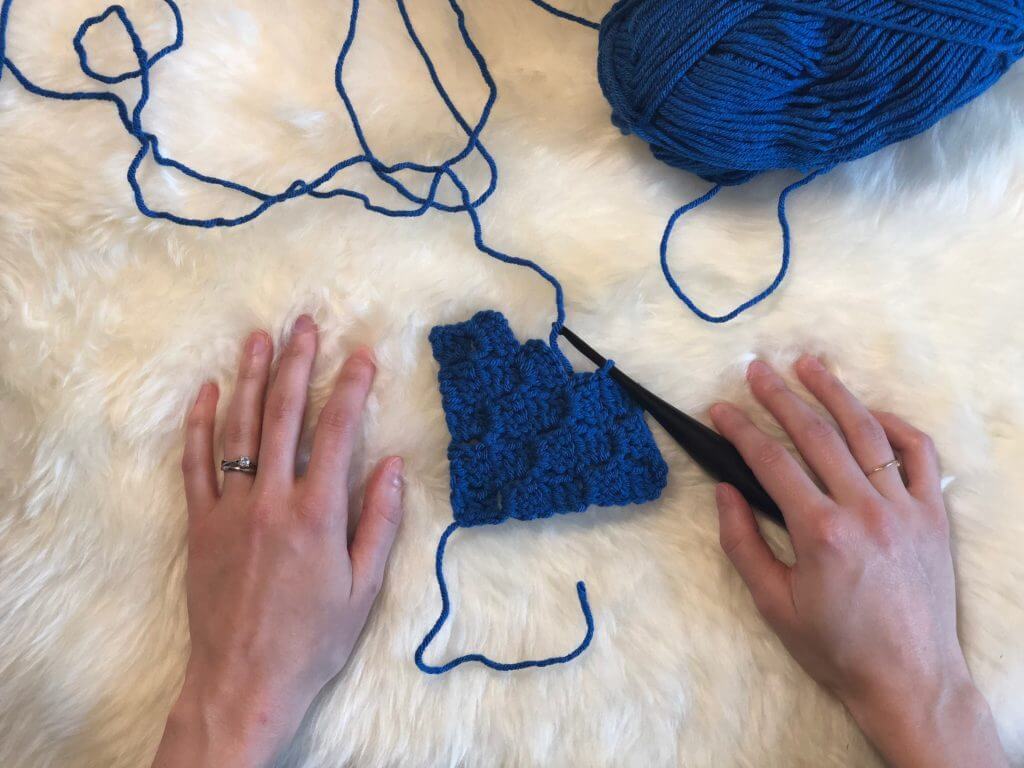
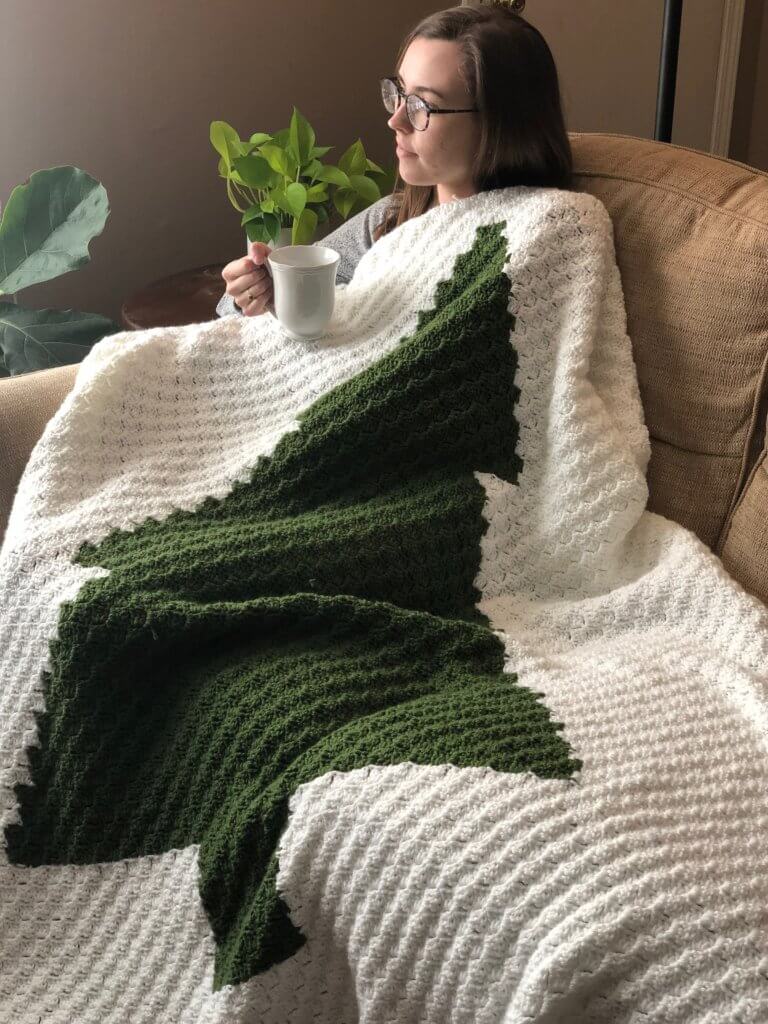
How to corner to corner crochet for beginners! This step-by-step photo tutorial includes how to increase, how to decrease, and best practices for creating your own corner to corner projects! Scroll down for the FREE tutorial!
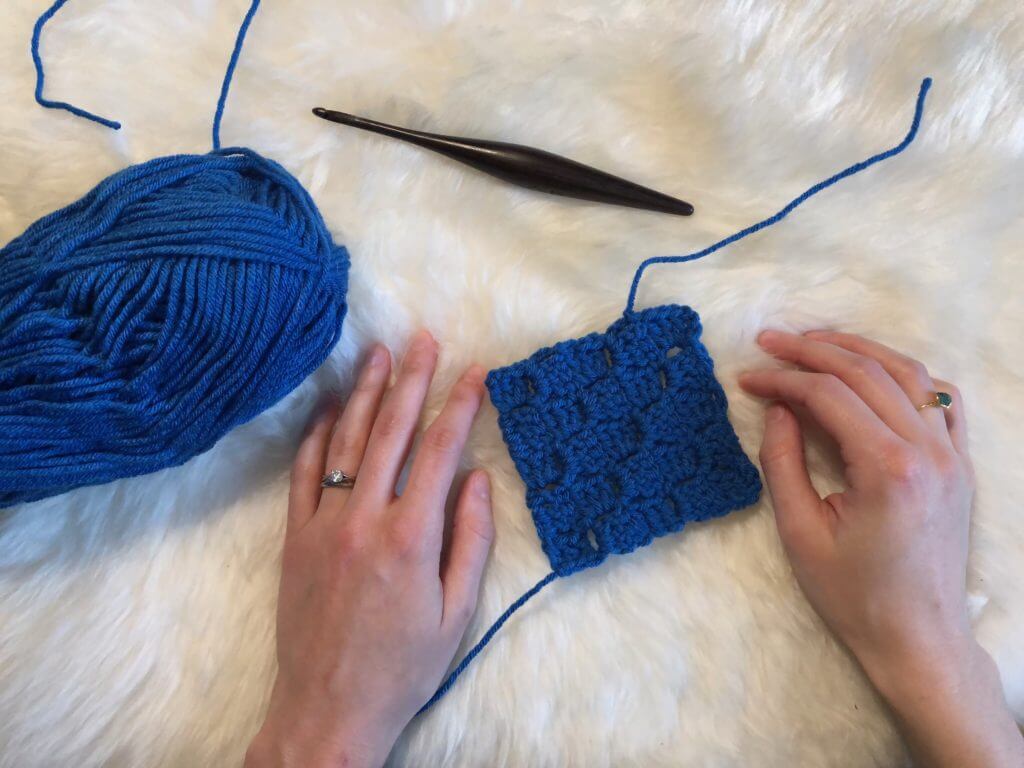
I have recently become obsessed with corner to corner (c2c) crochet. I love the look of finished c2c projects and I love how straight-forward it is! Once you get the basics of c2c down, it really is a “mindless” form of crochet: perfect for a Netflix night! If you’ve never heard of corner to corner crochet, I am here to tell you all about it. It is basically crochet’s version of graph art. You know, those coordinate grids that you got on “activity days” in math class that create a picture when you’re done? (Does anybody else remember those?)
That’s what c2c reminds me of – a crochet version of pixel art. The foundation of c2c crochet is the double crochet (dc) stitch. Basically, you are creating little “tiles” of dc that you join together as you go, working diagonally from one corner of your project to the other. (Otherwise known as the diagonal box stitch.) If your project is only one color, there is very minimal counting involved! Color changes in c2c crochet require you to pay a bit more attention to your work, but is still less finicky than changing colors in other forms of crochet in my opinion.
Important Tips:
- Each “tile” is made up of a ch 3 and 3 dc
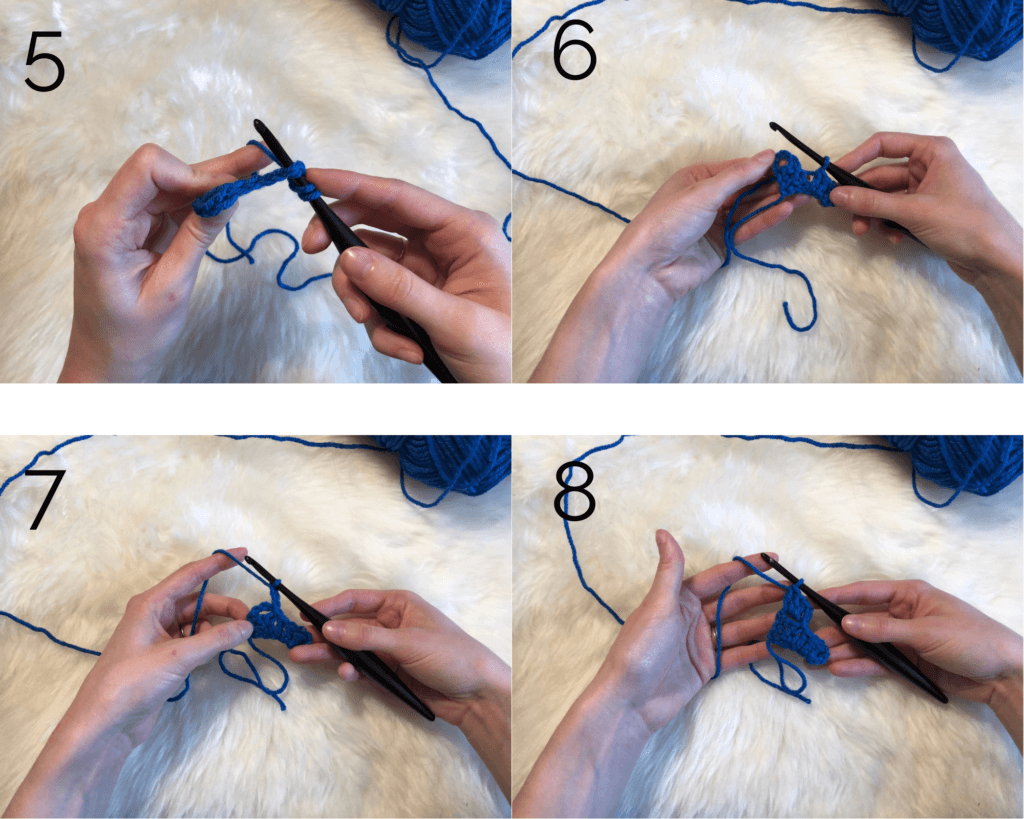
- While working into chain stitches at the beginning of a row, I recommend working into both loops of the chain instead of just the top loop (see picture 5). This is not absolutely required, but it is helpful for beginners! Working into both loops helps to naturally “turn” the work so you can properly identify the chain 3 space of the “tile” to which you are trying to join.
- While increasing, the number of “tiles” increases by one after each additional row
- You will always be either increasing or decreasing in c2c. There is no “regular” c2c, and decreasing is more accurately described as “no longer increasing”
- If your c2c pattern is for a rectangular project, there will come a point where you are still increasing on one side while decreasing on the other. In this tutorial, we will make a square swatch.
Tutorial:
Supplies:
- Category 4 (worsted weight) scrap yarn
- 5.5mm crochet hook
Abbreviations:
- ch – chain
- dc – double crochet
- sl st – slip stitch

1. ch 6
2. dc in 4th ch from hook
3. dc in next 2 ch. This completes our first row (1 tile).
4. ch 6
5. dc in 4th ch from hook, dc in next 2 ch. This completes our first tile of our second row.
6. Identify the ch 3 sp from the previous tile
7. sl st to ch 3 sp, ch 3
8. 3 dc in ch sp. This completes our second row (2 tiles).
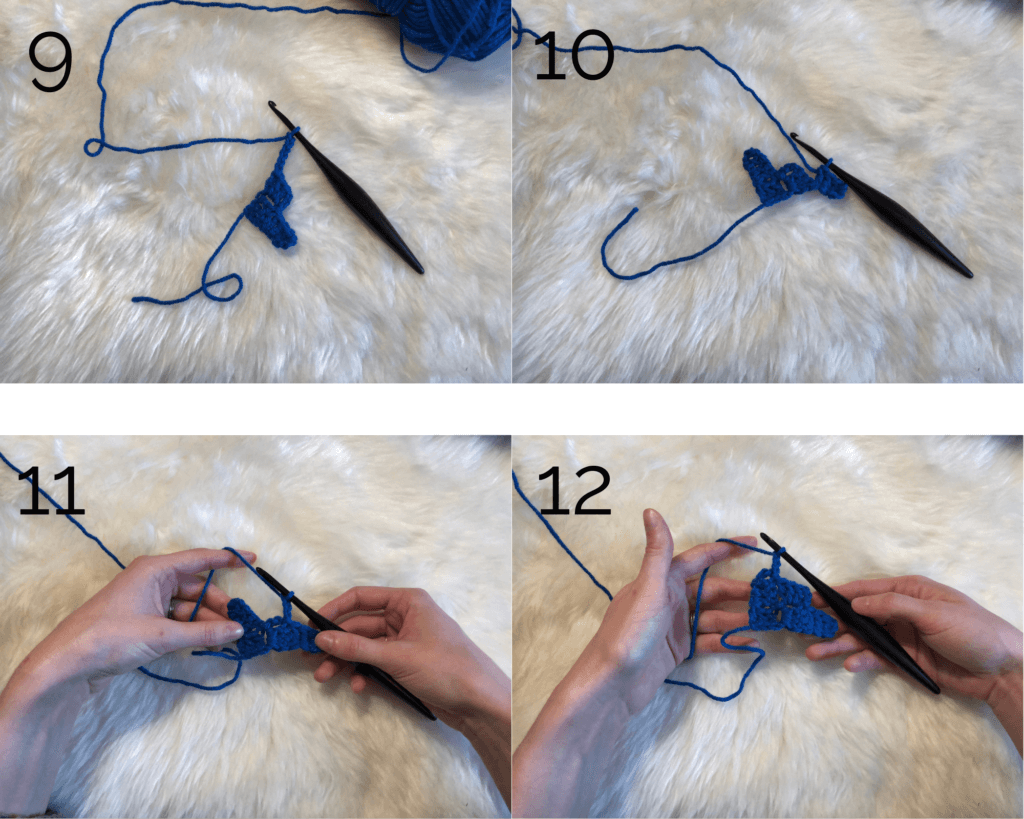
9. ch 6. This begins our third row. Each row while increasing begins with a ch 6.
10. dc in 4th ch from hook, dc in next 2 ch. This completes the first tile of our third row.
11. sl st to ch 3 sp, ch 3. This is how each tile after the first will begin.
12. 3 dc in ch 3 sp, sl st to ch 3 sp, ch 3. This is how you will work each tile after the first.
13. 3 dc in ch 3 sp. This completes our third row (3 tiles). We will be repeating this pattern for the rest of our increasing rows.
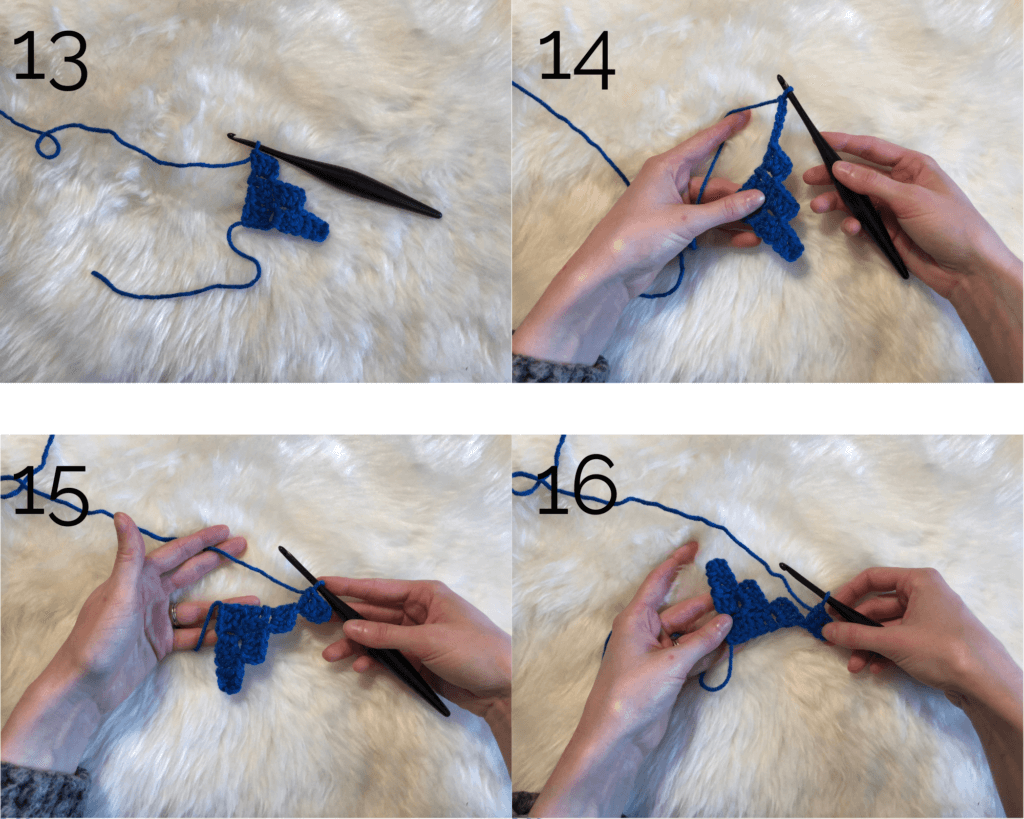
14. ch 6
15. dc in 4th ch from hook, 2 dc in next 2 ch
16. Pictures 15 and 16 illustrate turning the work after beginning a new row. With my left hand, I flip the work over so I can sl st into the ch 3 sp of the next tile.
We will be repeating in this manner for the rest of our increasing rows. Begin each row with ch 6, dc in 4th ch from hook, 2 dc in next 2 ch, turn work, *sl st to ch 3 sp, 3 dc in ch 3 sp, then repeat from * until you have finished increasing.

17. Continue making tiles until you get to the last tile of the row. We will now begin our decrease rows.
18. sl st to ch 3 sp. Instead of chaining 3 to create a new tile, turn your work. You will sl st back across the dc you just made, up to the ch 3 sp, sl st in ch 3 sp (see picture 19), then continue creating new tiles (picture 20).
19. sl st in ea to ch 3 sp, sl st in ch 3 sp. We have made our way back over to the ch 3 sp, now we can continue creating new tiles.
20. ch 3
21. Another view of the beginning of our decreasing row
22. 3 dc in ch 3 sp, sl st, ch 3, repeat to end of row
23. Each decrease row will begin with 4 sl st after you turn your work. After the first decrease row, it becomes very obvious where to create the next tile. You are on the home stretch now!
24. Finishing up the last tile in the swatch.

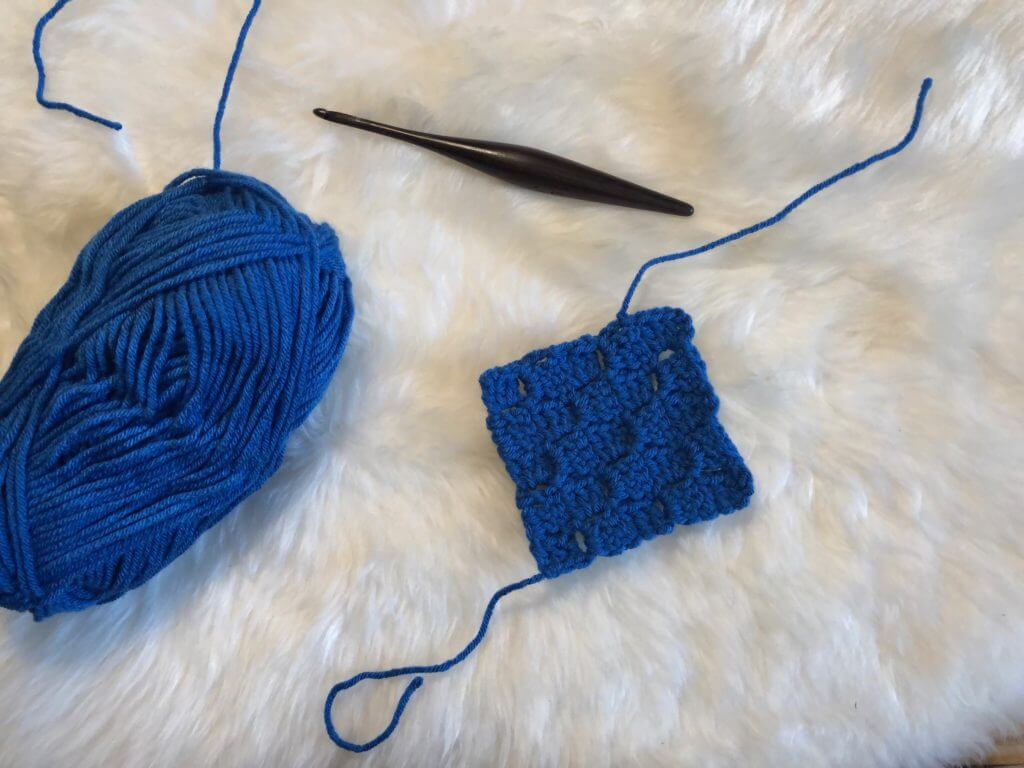
There you have it! You now have a completed swatch of corner to corner crochet. The possibilities are endless! Now that you know the basics, what will you create with corner to corner crochet?

